Spring for us typically means workshops, this year is no exception. As you know from previous posts, much of winter was spent traveling in northern Mexico, part of which was spent speculating and planning for straw bale buildings in the near future. Anyhow, once or twice a year, we teach a straw bale workshop as part of our Canelo Project workshops. For those not familiar with our work, they might be more correctly termed straw bale/clay buildings or houses in that we use as much clay soil as straw in the construction process. This year we did a small auxiliary building, allowable under the building code without a permit, due to the interior square footage that measures less than 120 square feet, for friends Jon Bolin and Shelly Eversole. Location of their site was approximately fifteen minutes from our home thereby allowing us an easy commute to the site.
The following images portray the building as it unfolded over the week of the workshop.
Most of the foundation was done before the workshop. On Sunday, we brought the group to the site to complete work on the foundation. Monday we spent in Canelo building the window and door frames along with the box beam for the top of the walls. For this type of building, the foundation consists of a concrete footer and stem walls of concrete block with foam insulation sandwiched between.
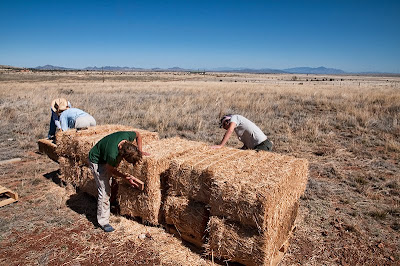
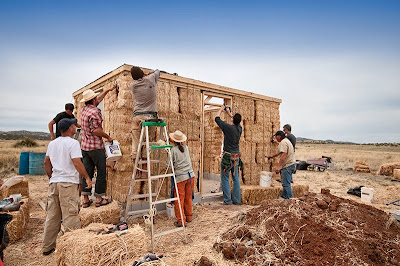
Cleaning and detailing the straw bales by removing the excess straw on the ends so that the bales will fit together more tightly in the walls.
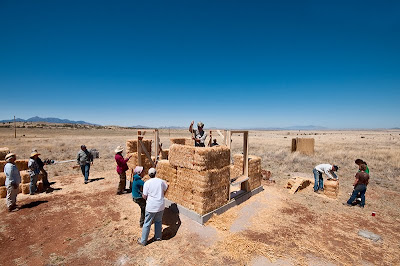
We worked half days at the site, Tuesday morning we began stacking bales on the foundation. By lunch we had finished all but the last course on top of the walls.
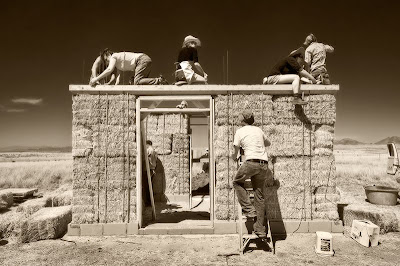
Wednesday morning we finished the top course of bales and assembled the box beams on the tops of the walls. The 3/8 inch all thread that we use to compress the walls and attach the roof to the foundation was also installed. Total compression for these four bale high walls was two inches.
Finishing the installation of the box beam on Wednesday morning.
Wednesday morning, last phase of tightening the all thread for compression.
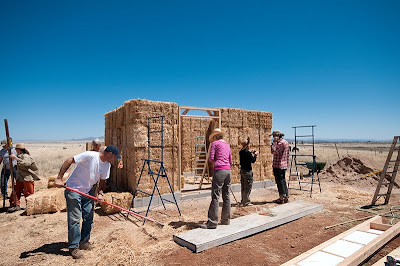
Late Wednesday afternoon, Oso and Benito, finished up details leveling the box beam, checking the all thread connections that are seen penetrating through the tops of the walls.
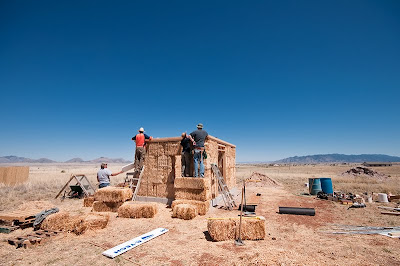
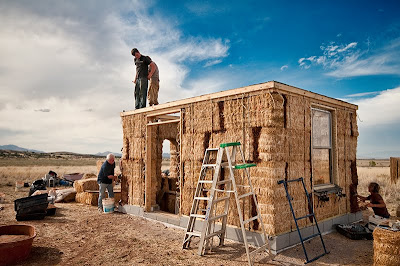
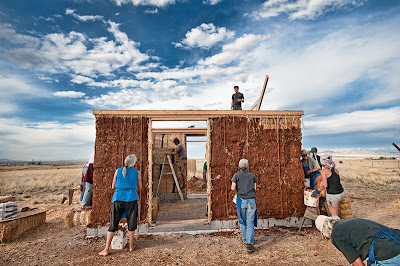
Thursday morning was spent mixing plaster and clay slip for the walls to be applied on Friday. The same afternoon we toured several straw bale homes in nearby Patagonia. From a distance, the walls late Thursday afternoon. The Mustang mountains in the background.
Beginning to fill the gaps between the bales with a mix of straw and clay slip.
On Friday we worked the full day at the site. The first half of the day was spent filling the gaps in the walls between the straw bales with a mix of straw and clay, attaching sisal rope to all the wood framing members to make a connection with the clay plaster, detailing the window opening and assorted other odds and ends.
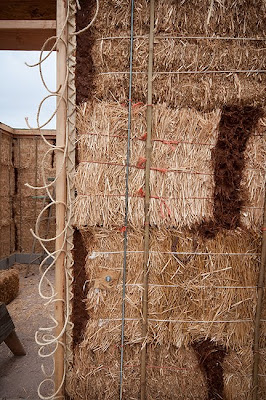
Sisal rope attached to the rough buck of the door, vertical bamboo pins and all thread used for compression.
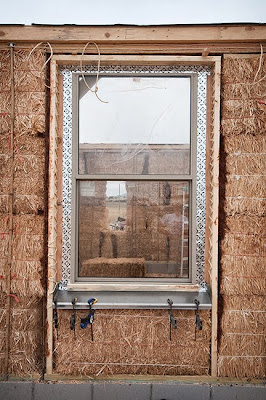
Final window detailing before plastering revealing the peel and stick flashing and metal sill pan.
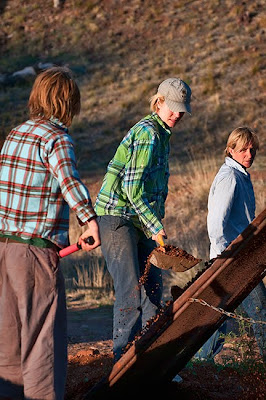
The girls Monica, Julie and Tracey screening clay soil through a quarter inch screen for use with plaster and clay slip.
Friday afternoon began by coating the straw bales with a clay slip to make adherence of the plaster easier.
Following the clay slip, the base coat of straw and clay plaster was added. This coat of plaster typically totals about an inch and a half in thickness. In about 2 hours the exterior of the building was finished with the base coat. At the same time, our sons Oso and Benito installed the roof trusses.
With the setting sun, the base coat was completed and scored, textured for the finish coat.
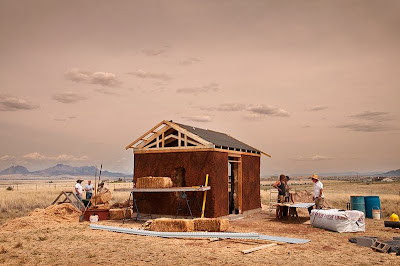
Benito and Oso worked through Saturday to complete the roof decking. By Sunday afternoon the metal roofing was installed as well.





I'm behind times! The sisal rope is a new thing to me. Is it stapled to the wood?
Thanks, Judy
We used inch and a half staples. Preferable to wrap it around something like a 1x and then use nails for the attachment, but on the box beam, there are constant interruptions with all thread and bamboo that make it difficult. And just to be clear, we use it with clay, not other plasters.
Bill
Hey Bill! I doubt you remember me – I came to visit for a sort of 'tour' with my Dad around Thanksgiving 2005 (I was 16). The Canelo Project has always stuck with me, and I was so glad to find this blog to see all that you've done since. My partner and I still have a passion for natural building – largely thanks to his discovery of your work all those years ago. I hope I get to see Canelo again sometime soon. Until then, Cheers!
PS: What camera/lens combination was used for the photography in this post? That landscape has been captured exactly as I remember it – breathtaking.
Sarah,
All those wide angle vistas are with a Sigma 10-20 lens on a Nikon body.
Bill
Thanks, Bill, for the 'refresher course' via your photos. See you in Flagstaff.
george
That's really an inspiring project! The exterior is unique, the design is unique, the location is unique, everything is extremely unique! I also have a unique home in Miami. Roofing company provided us everything we need like roofing supplies (Miami) and materials. The other materials in my unique home were also handled with care by professional architects and they carefully planned and designed our home.